Lesson 0 - Setting Up
For the uninitiated, C is a compiled programming language that's been around since the 1970's. It was developed by Dennis Ritchie at Bell Labs and it was primarily intended as a tool for him and Ken Thompson to develop the Unix operating system.
This is the part in the summary where I should tell you where and why you should program in C but I can't - It's got a million and one uses, and it's used in a million and one places. What's imporant to understand about C (and C++) are the benefits that you get from working in these languages.
C and C++ compile to machine language code - and a good compiler can make your C/C++ code go toe-to-toe with Assembly language in most cases. It gives developer extremely hands-on access to important underlying structures but since it's a high level language programs written in C and C++ can be ported to other platforms with little modification.
This is, of course, by design. Dennis Ritchie and Ken Thompson were porting Unix from the PDP-7 to the PDP-11 and that meant rewriting large chunks of the all-assembly code. By 1972 they'd ported the C compiler to the Honeywell 6000 and IBM System/370 - meaning all of the C code they had written for the PDP-11 could be re-used and still run at speeds close to native Assembly language.
If you're interested in the history of C and C++ you'll also see the name Brian Kernighan. While he's the first to point out that he didn't invent the C language, he and Dennis Ritchie wrote the first documentation for the language and he knows it inside and out. Kernighan is an expert explainer and prolific public speaker, so his name pops up frequently.
Getting Started
Enough with the history lesson - if you're looking to dip your toes into C/C++ then what you'll need is to set up some sort of programming environment. There are a lot of ways to do this but something you need to understand going in is that C/C++ compilers are intricate and far-reaching things. My experience with them (especially in Windows) is that they inject a lot of code into the OS and they can really wreak havoc for the uninitiated.
Don't panic.
I'm going to outline a way of creating a programming environment that can't screw up your computer. I would advise following along with the steps below if you're going to follow these tutorials - that way we're starting on the same page.
All of the things I'm going to recommend are free software, so trying out C/C++ shouldn't cost you a dime. (It will, however, require a significant amount of hard drive space, so bear that in mind.)
Step 1: Download and Install VirutalBox
VirtualBox is a PC emulator - it allows your PC to run a virtual PC in a window. That virtual PC gets its own hard drive and can't touch your actual PC. Your PC - the physical object you're touching - is known as the host and the virtual PC - the one you see in a window - is known as the guest.
You can download VirtualBox for free. Install that and do any restarts your OS asks you to do. (It might, VirtualBox needs to install some networking drivers.)
Step 2: Download Haiku
Haiku is a modern, but extremely compact and efficient operating system based on BeOS. Download the latest 64-bit version, which uses a g++ toolchain very similar to Linux.
Step 3: Set Up and Install Haiku
Haiku requires some specific settings to work reliably under VirtualBox. I would recommend following their step-by-step guide (with screenshots) for installing Haiku in VirtualBox.
Step 4: Getting around in Haiku
The first thing you'll need to familiarize yourself with in Haiku is the Deskbar.
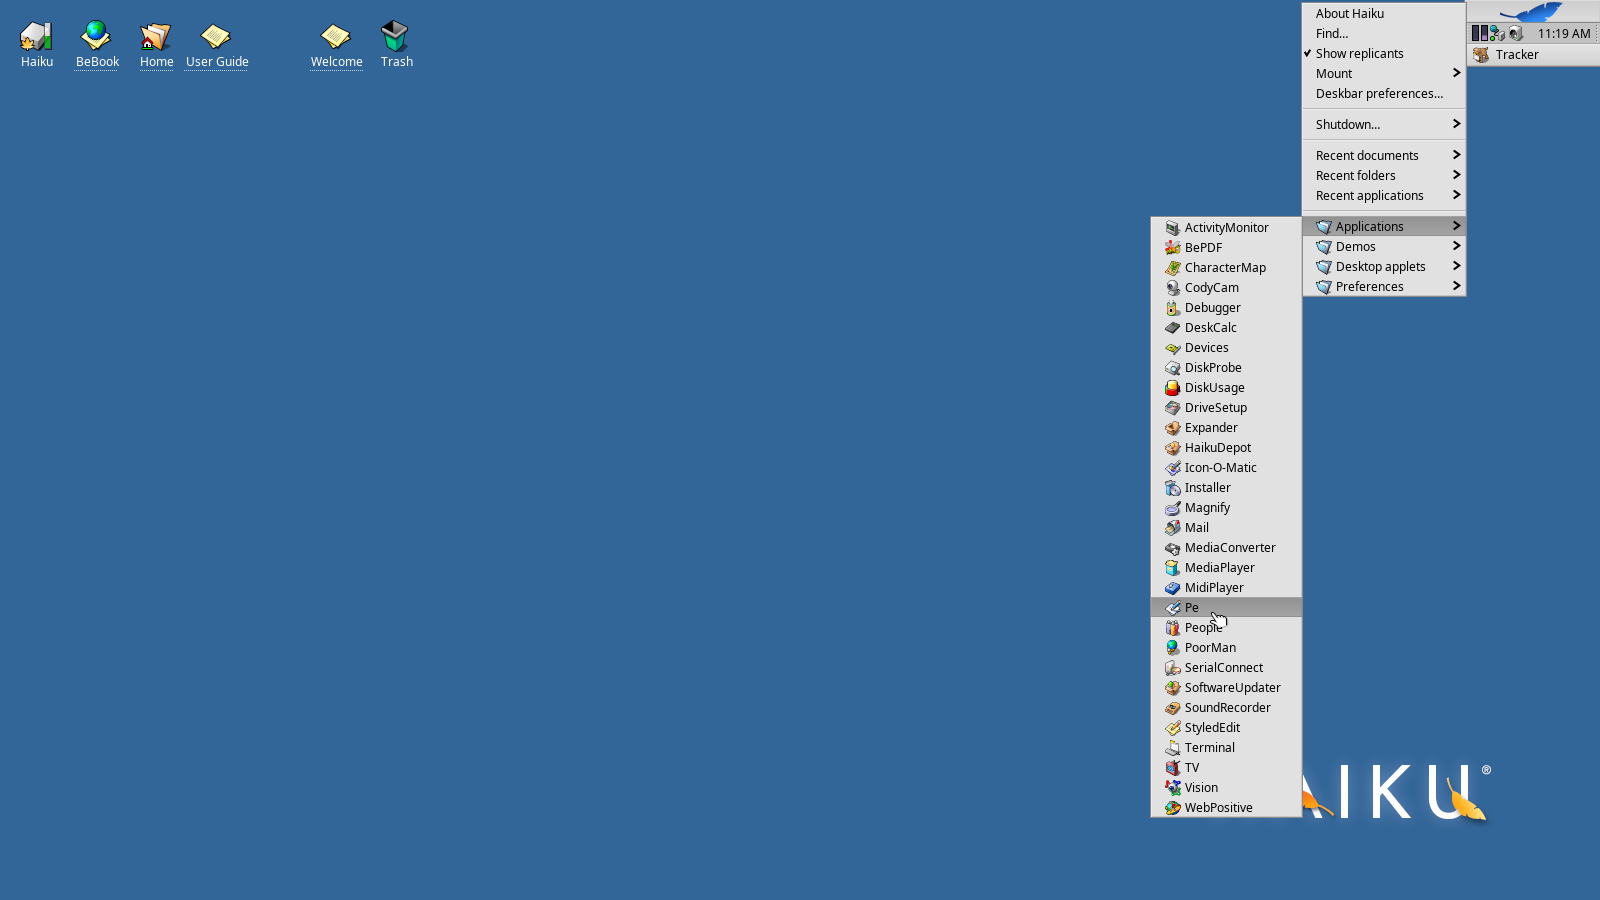
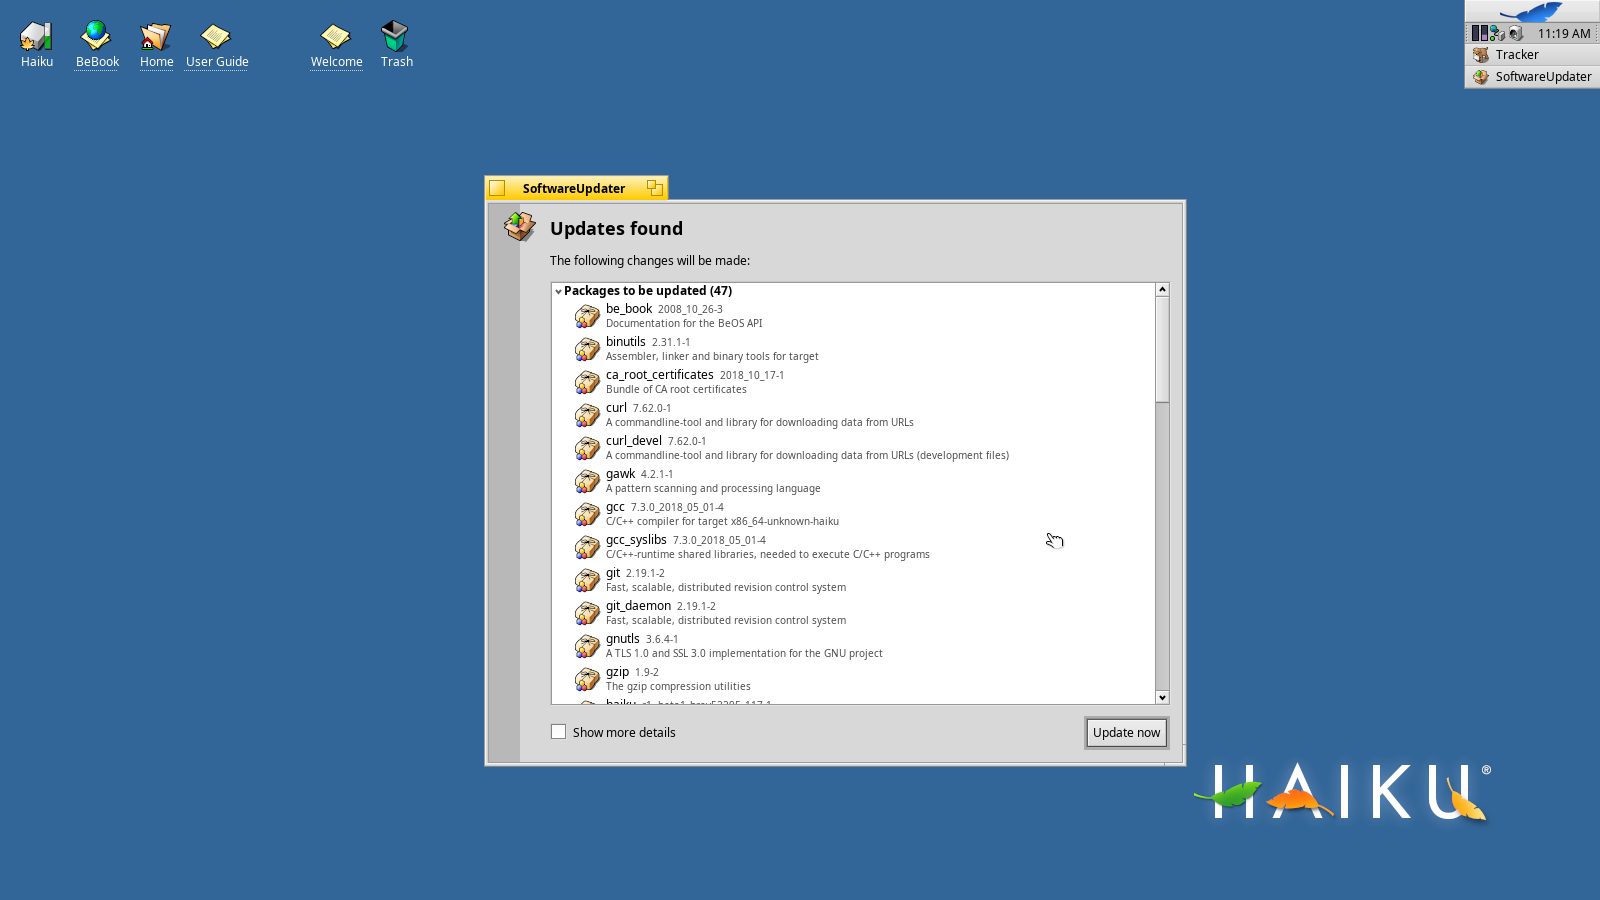
First, in the Deskbar you'll need to use the Application Menu. There are three things you'll need to find in here: Pe, a source code editor; Terminal, the command-line interface for Haiku; and Software Updater, which you should run after installing Haiku to ensure you have the most up-to-date software.

So let's just go ahead and run Software Updater now since we're working with a brand-new install.

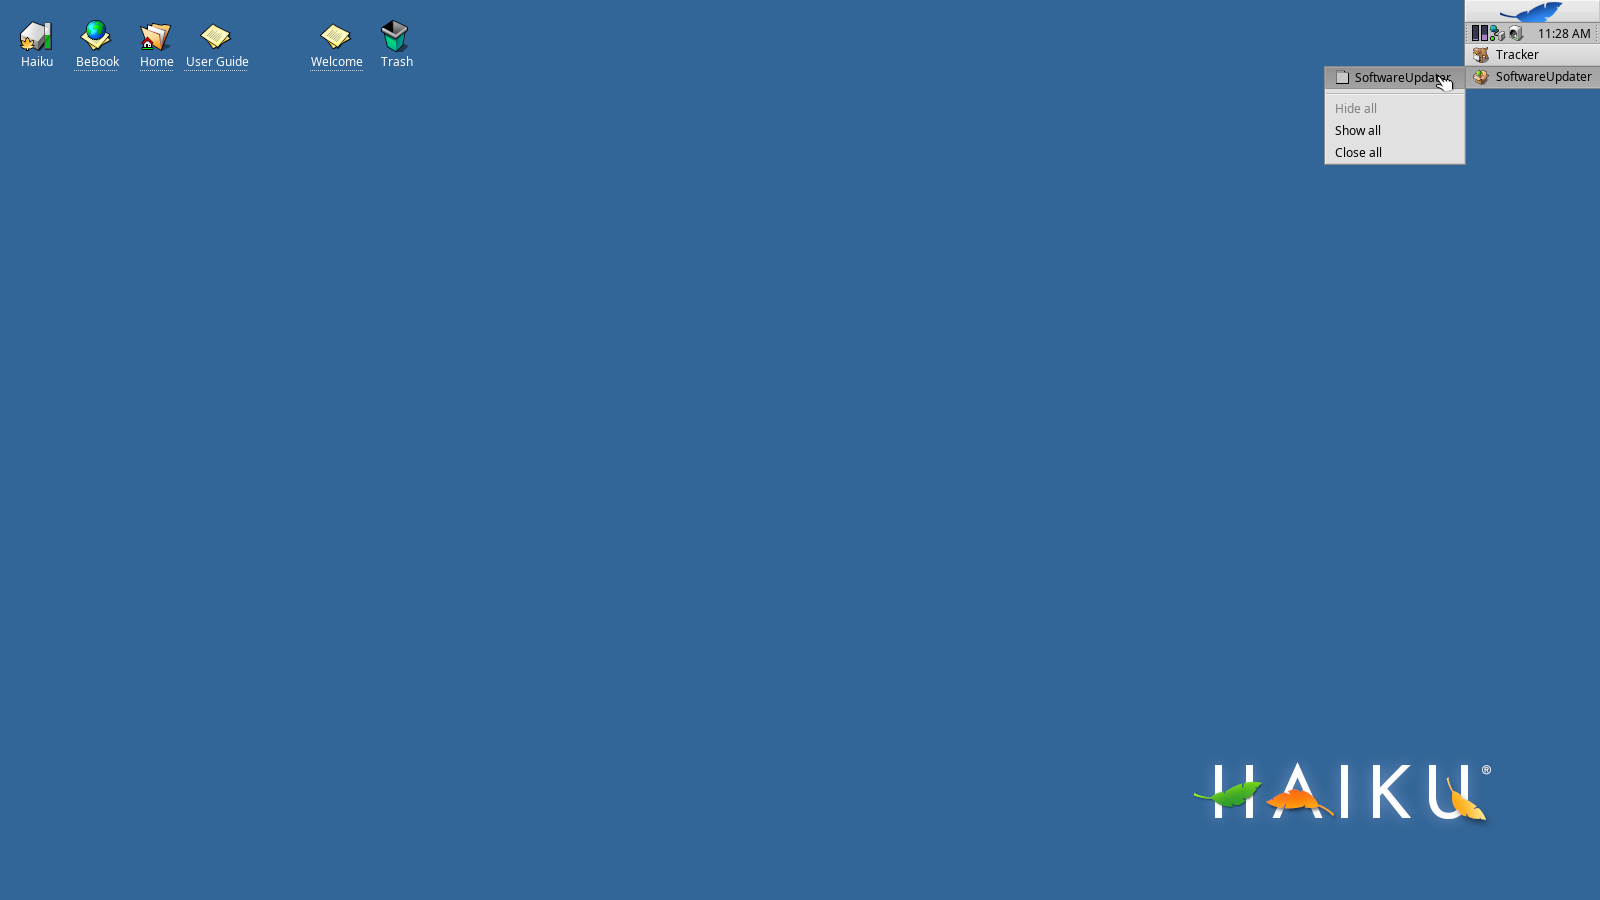
To hide a window, double-click on the menu's title bar. If you want to find a hidden menu, go to the Deskbar and look at the List of Running Programs. In this case, I've hidden Software Updater, so I can click on the name, and then the window that I want to restore.

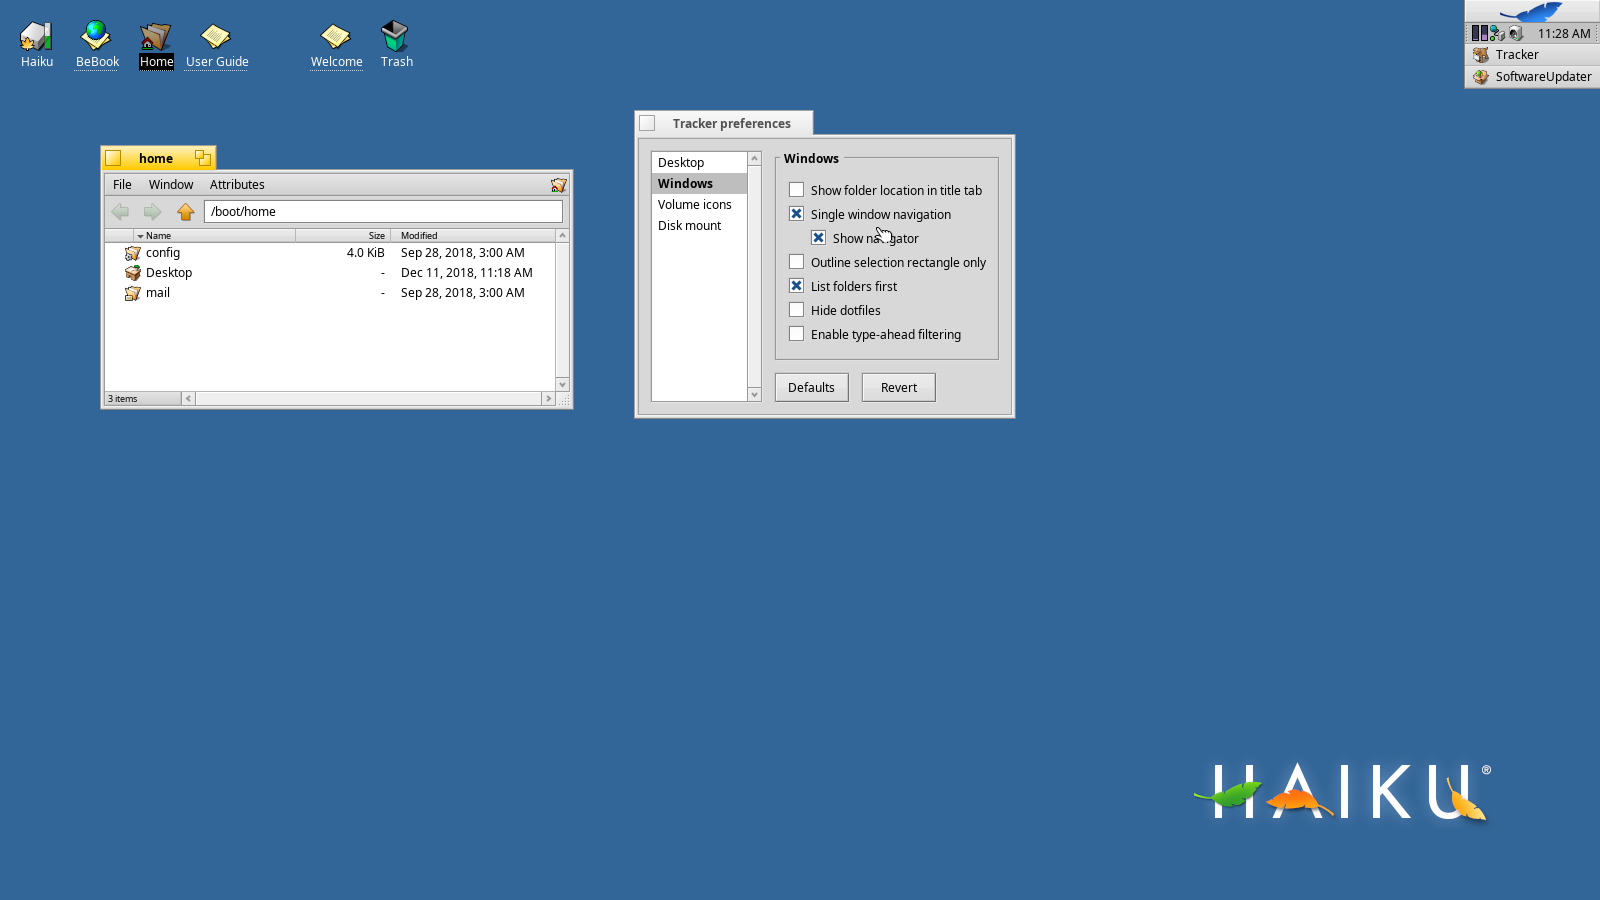
On the desktop you'll also want to take note of where to find you Home Folder. Double click on that folder and then open Preferences from the Window menu. If you're used to Windows or MacOS, you'll probably want to check off "Single window navigation" and "Show navigator."

One last note: the application that lets you view folders is named Tracker. If you hide one of these windows and need to find it later, look for Tracker in the List of Running Programs.
Learning More About Haiku
Haiku is a neat OS and even though most of what we'll need for programming will be done through Tracker, Pe, and Terminal you might be interested in learning more about it. If you get curious, double-click the User Guide or Welcome icons on the desktop.
Step 5: Time to Test
You should be ready to go now - so head on over to the first lesson to write your first program.